Showing posts with label Reviews. Show all posts

Wednesday, February 6, 2013

Fried Cinnamon Strips

While out the other day, I came across Sweet Cinnamon flavored CheeCha Puffs.  This is one flavor that I had not yet tried, so grabbed a couple of bags and got to work thinking of something simple and yummy that I could make with them.  And fried cinnamon strips is what I came up with!


*Dairy, Egg, Soy & Nut Free*
(contains gluten)


Ingredients:

1 cup Sweet Cinnamon flavored CheeCha Puffs (or just a handful, which is how I measured them today)
1/4 tsp ground nutmeg
a pinch of white or brown sugar
2 (10 inch) flour tortillas (check ingredients, many brands contain allergens)
cooking oil


Instructions:

In a cloth bag (we use Sling Sisters reusable bags), combine cheecha puffs, sugar and nutmeg, and with a rolling pin, crush until the cheecha puffs are a powder.
At this point, I transfer my mixture into a bowl so the oil in the recipe doesn't stain the bags.  If using plastic, you can just keep it in the bag.
Cut tortillas into 3X2 inch strips.  

Heat 1 inch of oil in a skillet or pan, to 375F, or over medium-high heat.
Fry 4 or 5 tortilla strips for approximately 30 seconds on each side, or until golden brown.  Drain on cooling rack on top of paper towels.  

While the strips are still warm, place into cheecha puff mixture and coat the strips.  Either toss the bowl or shake the bag gently.  

Serve immediately or store in an airtight container once cooled.  

**Please note, as you can see at the bottom of the pile there are a few really dark ones.  These can burn very easily, so keep a close eye on them while they're cooking!**

Now, I personally am not a huge fan of Nutmeg, so next time I make these I might choose to add a bit of extra cinnamon in place of the nutmeg.  As my husband often tells me, recipes are a guideline.  Play around with the spices, see other creations you can come up with!  And of course, please share in the comments section if you find something else to add to these tasty treats!


Tuesday, January 29, 2013

Shepherds Pie

There really is no better comfort food than Shepherds Pie.  It's easy and filling, and just an all round easy to please everyone type of dish.

I decided to see what I could come up with, using a bag of Original CheeCha Puffs, and it actually turned out really good!  My family loved the crunch factor!


*Dairy, Soy, Egg, Nut and Gluten Free*


Ingredients:

1.5 pounds lean ground beef (or meat alternative)
1/2-1 onion, chopped finely
1-2 cups vegetables, fresh or frozen (all I had was corn, but carrots and peas would be wonderful too.)
4-5 potatoes (more or less, depending how thick you want the "crust")
4 Tbsp butter or margarine (we use Earth Balance Soy Free)
1/2 cup beef broth (check ingredients on the brand you use)
1 tsp worcestershire sauce (we use Lea & Perrins brand)
1/2 bag CheeCha Puffs, original flavor, crushed.  (I put them in a cloth bag and smooshed them with my hands.)
Salt and Pepper, to taste
Pinch of paprika
Grated cheese (we use Daiya, cheddar style shreds)


Instructions:

Boil peeled potatoes, once cooked, add in 2 tbsp butter and mash.  Set aside.  

In large frying pan,  melt 2 tbsp butter and brown the ground beef.  Drain off any fat.  Put ground beef back into the pan, add in onion and any vegetables.  I would suggest if you're using fresh carrots, that you steam them prior to using them or they might not be cooked through.  
Add worcestershire sauce into the pan, as well as the beef broth.  If you find your meat mixture getting dry, you can add more broth than what's called for in the recipe.  Simmer over low heat for approximately 10 minutes, stirring occasionally.  Add in salt and pepper.

In a casserole dish, place beef and veggie mixture.  Spoon mashed potatoes on top, and spread out to cover the meat and veggie mixture.  I find it's easiest to spread and flatten the potatoes using a fork.

Add a layer of grated cheese on top of the potatoes, as well as the crushed up CheeCha Puffs.  I took my pinch (which actually was probably a few pinches) of paprika, to add some color.

Everything is cooked already, so all you're really doing at this point is heating it all up, melting the cheese and browning the wonderfully crunchy topping you've added.

Bake in a 400F oven for 15-30 minutes, keeping an eye open to make sure nothing burns.

In the past, I've browned  the potatoes simply by putting the oven on broil, but I would think that if you're using any type of topping, they'd burn that way.


This meal was filling, and my taste testers (4 and 6 years old) gave it two thumbs up!

I'll definitely be making this again, I might even make a few to put in the freezer to have for a night when we need an easy and quick dinner!


Sunday, January 20, 2013

As promised, creation #1!


When I was asked to create foods using CheeCha Puffs in the recipe, I thought to myself...no problem.  I am no stranger to the kitchen, so this will be easy!  Well, I was wrong.  It's not easy.  I cannot use any egg, dairy, soy or tree nuts in any of my baking or cooking due to allergies, which already limits what I can make and how I can make it.  Plus, it had to be kid approved.  Which means, the easiest way to come up with my first creation was to think...like a kid!

And this is what I came up with.  It's basic, it's simple, it's VERY easy, and it was DELICIOUS!!!!!


*Dairy, Egg, Soy, Nut & Gluten Free Chicken Fingers*


Ingredients

1 pound boneless skinless chicken breasts (although I'm sure drumsticks, thighs etc would work too)
1 bag Sea Salt & Spiced Black Pepper CheeCha Puffs
2-4 tbsp butter or margarine (we use Earth Balance Soy Free)

Preperation

*In a plastic or cloth bag, crush the entire bag of CheeCha Puffs with a rolling pin until they resemble bread crumbs.  Pour onto a large plate and set aside.
*Thaw chicken and slice breasts into thin strips (or nuggets if you prefer)
*Melt margarine in a bowl

*Dip each strip or nugget into the melted margarine and coat thoroughly.  Take each chicken piece and roll it into the crushed up CheeCha Puffs until they are well covered with the mixture.

On a stone or greased/lined baking sheet, bake the chicken for approximately 30 minutes (or until cooked) in a 400F oven.

It's THAT easy!

I was a little worried that the chicken would either come out with soggy CheeCha Puffs, or that they would be burnt, changing my meal to a "Blackened Chicken using CheeCha Puffs" type dish.  But it was quite the opposite.  The chicken strips were a wonderful golden color, with a nice crispy coating on them.

We had ours with a huge tossed salad, and it was the perfect light dinner.  Pair this up with fries, salad, pasta..........and you'll have an easy and quick dinner sure to please everyone!


Wednesday, November 23, 2011

Coconut Milk "ice cream" (Dairy and Soy free!)


I finally found this!!!  Let me tell you, coming from someone who has absolutely no clue as to how to make home made "ice cream", (and one day I will learn), I was very happy when I saw this! 
To put it simply, it's delicious!  Creamy and satisfying!  I do believe there are quite a few flavors of this available in Canada however, this is the only one I was able to find. 

Check out the Turtle Mountain website to see all of their amazing products!

Amy's Mac and Cheese.....The review

Mac and cheese is the one thing I have yet to master when it comes to making it safe for one of my kids.  Sure, I could just throw on some of the cheese that I have for him, we always use Daiya cheese however, I never can get it creamy enough to have it taste like the traditional stuff.  So, when I was out getting groceries the other night, you can only imagine how excited I was to find Amy's Gluten free, Dairy free, Soy free-Rice Macaroni in the freezer section at the store!  Not ONLY did I find that, but I also realized they are now carrying Daiya cheese as well! 
I bought two boxes of the Rice Macaroni, came home, put them in the freezer and decided if my child loved it, I'd go back and stock up.


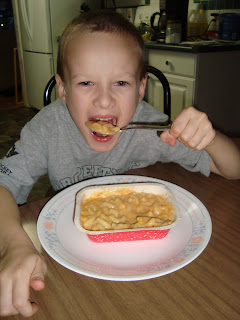
I made this for dinner (along with some salad, and lets just say that he MUCH preferred the mac and cheese to the salad, but I guess that's what kids will do!) and was surprised that there were actually a few cooking options to choose from.  Oven, microwave or toaster oven.  Seeing as I was cooking something else for the rest of the family, we chose to use the oven.  It took a total of 30 minutes from freezer to the table, and I was shocked at how creamy it was!  My boy ate it right out of the little container it was in, and to tell you how much he enjoyed it, he didn't even ask for ketchup on it! 


Thank you Amy's and Daiya for making yet, another quick meal that meets the dietary needs of my family! 

We will definitely be buying this again!

Friday, August 5, 2011

Ian's Natural Foods....the taste test and review

We recently discovered Ian's Chicken Nuggets at one of the grocery stores we shop at.  This is great news!  One can only imagine how difficult it is to find a simple Chicken nugget that is allergy friendly, and for a 5 year old child, Chicken nuggets are a much desired food!
As I picked up the small box of nuggets, I was pleasantly surprised that they are free of pretty much everything.  Free of wheat, gluten, casein, milk, eggs, nuts and soy.  Our 5 year old was very very excited that finally he could have Chicken nuggets and fries for dinner!  On the drive home I thought to myself, I wonder how these taste?  I mean, they can't taste like "normal" chicken nuggets, missing so many things that are commonly used when making tasty breaded little treats. 
We baked them in the oven, and then the moment of truth.......he devoured them!  He loved them!  And it certainly made one meal much easier than cooking and baking for my family has been for the past while. 
If you go to the Ian's Website, all of their foods and allergen information is there.  I love the fact that the information is so easily accessible, I find it very frustrating when it takes me tons of time to find what I am looking for when it comes to certain companies.  This isn't one of them!  I love that you can check off the allergen's you're looking for, and it will search for the "safe" products for you.  Such a great feature! 

We will definitely be picking up Ian's products to throw in the freezer, for quick, easy and safe meal ideas. 

Here is an allergen chart that was provided for me to put up on the blog, please use it and the website to find what foods are safe for your family!


Thank you Ian's for making safe foods that my children can enjoy!!!!!

Sunday, July 31, 2011

Healing Hazel & my personal review

Click Here for the Healing Hazel Website


I have psoriasis. I've suffered from it for almost 9 years.  I have it on my scalp (worst place on me), my back, my stomach, under my breasts, behind my ears and in the creases in my ears. I also have odd patches just here and there.  It can get extremely itchy and causes me both great pain and stress.  I hate the way it looks, and limits the things I do outside the house.  It is limiting, because it looks terrible.  Thankfully, mine is mostly in places that I can cover up, but if I wear anything dark, I am constantly brushing my shirt off and looking in mirrors, because the flakes that end up on my shirt make me look like I have terrible dandruff.  At times, my scalp will bleed from the scratching I've done.  This happens mostly in my sleep. 
I have tried medicated lotions and ointments, special shampoos etc and if anything, they only bring me a bit of relief.  None though, have ever started to heal the psoriais "leisons" or scales and none have taken away the itch.  Most things will go through what I like to call the "honeymoon phase" as it seems it only lasts a short while, then the problems start creeping up again.

I recently started doing my own research on Hazelwood and the healing properties it holds.  I was very skeptical that something like a necklace, bracelet etc would work better than anything I've tried.  Well, let me tell you.......I was wrong.  I purchased my necklace(s) from Healing Hazel and have now been wearing one for only a few days and I am shocked.  Shocked and very very pleasantly surprised.  Within 24 hours of wearing the necklace, I noticed I wasn't itchy on my scalp as I had been.  I had learned to live with the painful itch, and now it wasn't there.  This is a HUGE positive for me!  After 48 hours, I noticed that some of the leisons under and on my breasts are not as mean and red looking.  The skin is getting softer on the spots that were so dry and scaly (gross, I know, but thus is life for anyone who has psoriasis, unfortunately).  I know these seem like little progressions, but for someone who has had these skin issues for so long, once that just sort of become a daily part of life, this is an amazing step in the right direction.  I should also mention, that I have anaphylaxis to quite a few foods, including Tree Nuts.  I did my research prior to buying the necklace, and it is completely fine and safe for people with nut/tree nut allergies. No part of the nut is in contact with the branches, and every single site I've looked at states that they are particularly careful about this when harvesting the wood. 
If you google "benefits of hazelwood" or "healing properties of hazelwood" you'll read for yourself all of the ailments that it can help.  There are too many for me to write about at the moment, but as I continue wearing my necklace, I'll be sure to blog even more on it!

There are many companies offering Hazelwood jewellery however, my experience with this one particular company has been great so far and I'd recommend them! 

Thanks for the awesome product, Healing Hazel!